AWS offers single sign-on (SSO) at no charge, and setting it up can simplify your login experience, especially if you have more than one account.
- Log in as the root user in your account. Navigate to "AWS Single Sign-On" and click "Enable SSO". It will take a few seconds to set it up, then you will see a message that says that SSO has been successfully enabled. Now you can select "AWS accounts" on the left menu. You should see your account on the "AWS organization" tab.
- Next, you will need to create permission sets on the "Permission sets" tab. Click "Create Permission Set" and on the first page of the wizard, select "Use an existing job function policy". On the next page, select "AdministratorAccess" and click through the subsequent tabs to create the permission set. Do the same to create permission sets for "PowerUserAccess" and "ViewOnlyAccess", too.
- Now you can create users for logging in. If you're planning to add multiple users to your account, it's advisable to create Groups to assign to permission sets and add your users to the relevant groups (e.g., Administrators, PowerUsers, ReadOnly). I'm performing these steps for my personal account, so I will grant access directly to my User. Select "Users" on the left menu and click "Add user". The username can be an email address, but doesn't have to be, but an email address can only be used for one user in the account. If you created any Groups, you can add the users to groups, but this step is optional.
- Once you have created your Users (and Groups), return to "AWS accounts" from the left menu so that you can assign them to your account. On the "AWS organization" tab, click the checkbox next to the account, then click "Assign Users". On the first page of the wizard, select the Users and/or Groups to assign; on the second tab, select the Permission sets they will be granted (can be more than one), then click "Finish".
- Finally, if you want to set up a custom login url, click "Settings" on the left menu and edit the "User portal URL". You can also adjust the MFA settings on this tab.
The user(s) you created will receive a verification email, and once the account has been verified, you'll be able to log in using the address you set up for your user portal. Once you've logged in, you'll be able to select from the permission sets you created and access the AWS Console or CLI. For example, for my AWS account I've added the signon portal rwright.awsapps.com, and added my newly created user to all three permission sets. After I log in, I see something like this:
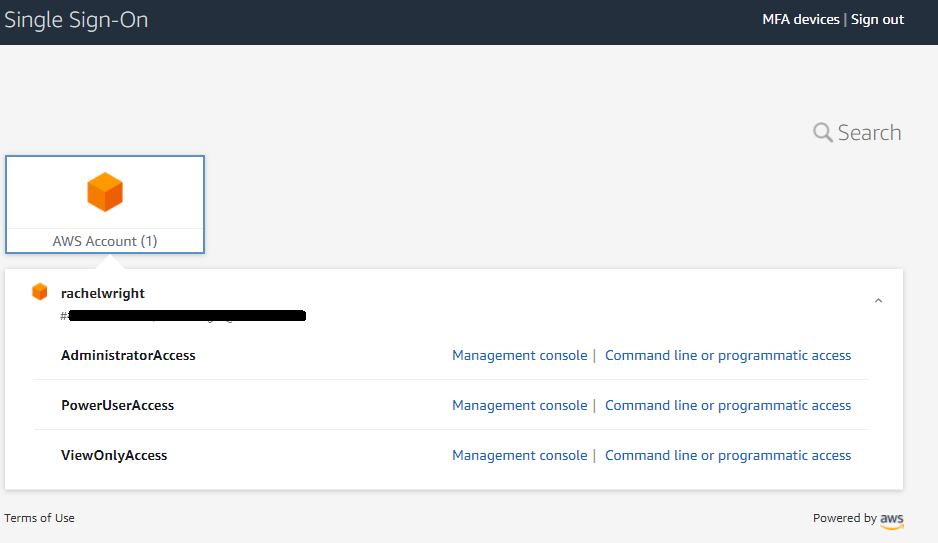
Hooray! I can log in as an IAM user without having to remember my account id!